
To create a new individual reservation, go to Reservations > New
Reservation, use shortcut <Ctrl> + <N> or select 'New
reservation' in the left toolbar (Frontdesk tab)
It is also possible to start a new reservation using the Rate Query. See Rate Query.
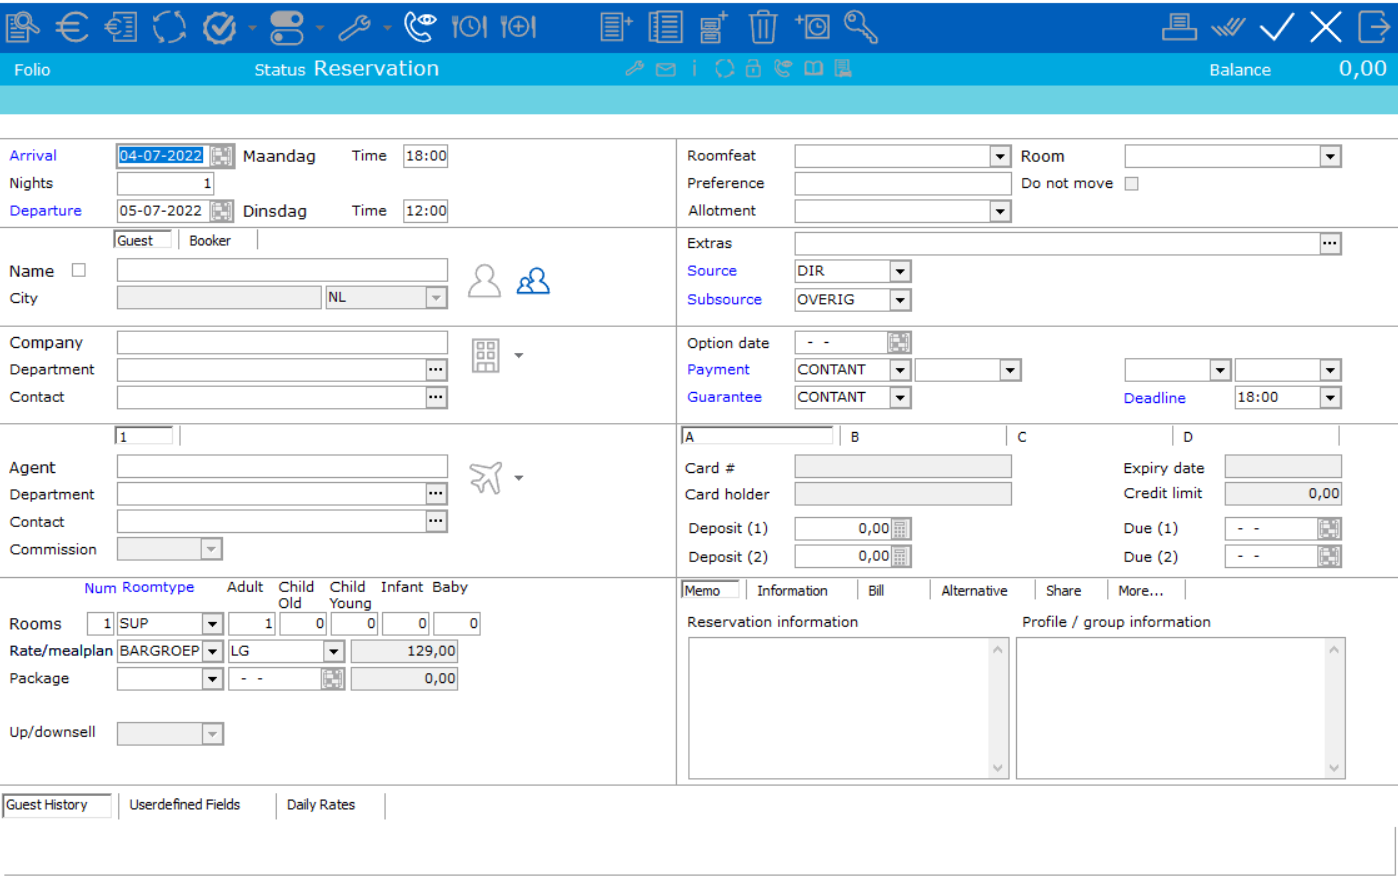
The window will display 'New'
and the icons at the top will remain inactive (greyed out) until after
the reservation is saved.

The reservation window is divided into different sections. Each section
is explained below.
In the first field the Arrival and Departure
dates are entered. Fields marked in blue text are mandatory fields.

Arrival - Behind Arrival
the date of arrival is entered or carried over from the rate query. Then
the default check-in time is entered automatically in the time field. It
is also possible to click the calendar behind the entry field. Here, a
date is selected.
Time - In the Time
field the time of arrival and departure of the guest is entered, if known.
If the system is linked to a key card interface, these times are also
sent to the key card system. If the default check-out time is 12 o'clock
and a guest wishes to use the room until 13.00 h, the departure time can
be set at 13.00 in this field.
Nights - In the Nights
field the number of nights is entered. If "3" is entered in
this field, the departure date will automatically be set to 3 nights
after the date of arrival.
Departure - In the Departure
field the date of departure is entered. If the user does not enter the
number of nights, the system will calculate this based on the departure
date and enter the number of nights automatically. Again the calendar
can be used for this purpose.
The Arrival, Nights and Departure fields are in blue. This means that these
fields are mandatory. If
no information is entered in these fields, the reservation cannot be saved.
All blue fields must be completed in order to save the reservation.
Usually, the arrival date will automatically be set to the actual date.
It might however also be empty in which case the arrival date must be
entered. The Time fields will always
be completed automatically based on the default system settings for arrival
and departure times. See Default Values.
In the Guest field the name of the
guest is entered

The small box behind 'Guest' can be
checked. If this box is checked, no
guest profile will be created. In this case the icon (on the right) will
be greyed-out, which means that the guest name does not have its own guest
profile.
Example with linked guest card:

Example
guest name is not saved in the database:

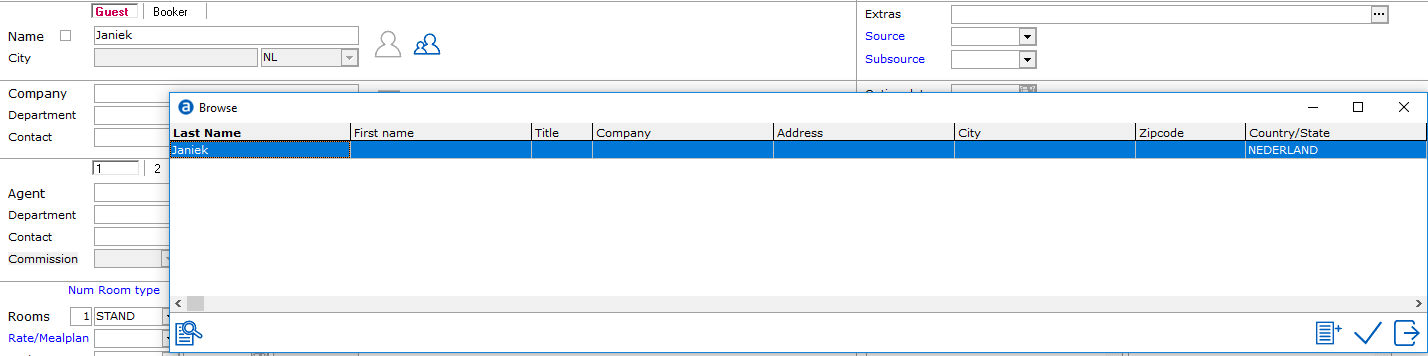
To add guest details, type the name of
the guest in the text field. Check the tickbox if no guest card needs
to be created, or use <Tab> if a guest card needs to be linked.
Search for the correct guest card:
Or create a new card using  . For more information,
see Guest Profile.
. For more information,
see Guest Profile.
In the City
field the city of the guest is entered, which is taken from the guest
details profile. If the name of the guest is selected with the help of
the browse window, the city will be
entered automatically. If the box is checked, the city cannot be entered.
In that case the cursor
will jump directly to the nationality field. The next field is Nationality/Country. This field
is mandatory.
 Use this icon to access the guest list.
The guest list allows linking up to 99 guest to a folio. The Guest List
can be accessed from the folio by clicking this icon.
From the second guest and up, the Guest List is used for linking multiple
guests to a folio. Click the 'New' icon and add guests to the guest list.
Double click a profile to access the guest profile.

If all information has been entered, the cursor automatically moves
to the next section, which is the Company
fields.

Entering a company name is similar to entering a guest name. Again,
the browse window can be used. When searching for profile entries in the
database, a wildcard search asterisk * can be used. Enter and * followed
by the first few letters or the complete name of the company concerned
and then press the <Tab> key. Again the browse window
will appear seeking all companies that match the criteria entered. This
applies to the Company field as well
as the Department and Contact
fields. If the company has not yet been saved in the database, a new company
profile can be created. All company information can be entered into this
profile.
See the The
Company Profile
The next field is the Agent field. An
Agent is a travel agent arranging bookings/holidays for third parties.
An agent profile must be treated as a company profile. It is also possible
to have two agents linked to a folio reservation. By selecting tab '2',
the second profile can be entered if required.
See also The
Travel Agent Profile
In the Commission field the commission
plan for this reservation is entered or if a default commission plan is
linked to the agent profile, it will be filled automatically. IDPMS
will automatically calculate the commission to be paid to the travel agent based
on the commission plan setup. See Accounts
Payable Module for more information.
This information is filled from the original query in rate query but can be changed.
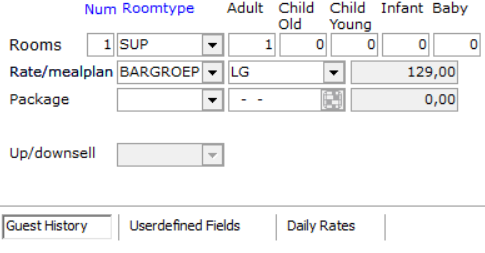
Num, Roomtype
and Rate/mealplan fields
are mandatory fields.
Num - The number of rooms to be reserved is entered. The default
setting for this field is "1".
Roomtype - The room type to be reserved is selected. Clicking the
down-arrow a different room type can be selected. See Room Types for more information on room
types.
Adult - The number of guests (adults)
Child / Child young / Infant / Baby - The
number of children. Hotels
are able to define multiple age categories for reservations. Using
these age categories makes it possible to differentiate rates. Enable
the age category in Option
Front desk
Rate/mealplan - Select the rate type and the meal plan. A rate type
is the price of a room, depending on the number of guests in the room.
See Rate
Types. Meal plans are used to create different types of meals that
can be quickly added to the room rate. See Mealplan for
more information. The total room price is calculated automatically. The
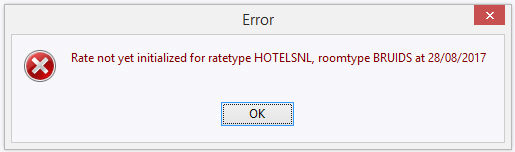
rate plus the meal plan is the room price. When a rate type is entered
which does not correspond with the selected room type, IDPMS will give
a warning.
Package - the package reserved can be entered. Also the starting
date of the package concerned can be entered here, since a package
has a preset duration. This means that the package can start on any date
within the period of the stay, as long as the end date of the package
also falls within the period of the stay. See Packages.
Discount - Rates can be set up
to automatically apply a discount to a specific Relation. See Discount.
Up/downsell - Means selling a room up (for more) or down (for less)
while maintaining the original room price. A Deluxe room can for example
be sold for the price of a standard room. Whatever room type is selected
in this field, the price will reflect that room type. The Up/downsell
option is optional. See Option
Front desk. The UpDownSell field in new reservations and master activities
is read only during reservation creation, as long as the reservation has
not been stored for the first time.
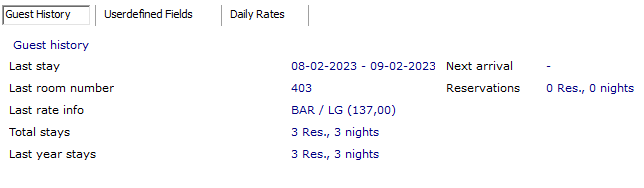
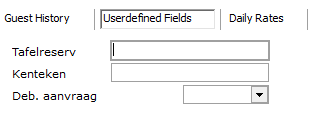
Guest History - Guest history displays the history of the guest card selected:
User defined Fields - User Defined
Reservation Fields are custom fields that can be added to the reservation
screen.
See User
defined fields for more information.
Daily Rates - Using fluctuating
prices, the rates can differ per day. Tab Daily Rates gives an overview
of the "breakdown" and displays the rates, mealplan, packages
and guests per day.

On the right-hand side of the reservation window, specific room preferences can be entered.

Roomfeatures - A number of room features can be entered, in order
to take the guest's request into account. These features are all attributes
that might be specific for a certain room. See Features
for more information. Features include for example non-smoking, 2nd floor,
garden view, etc. If more than one feature is required, use the <Ctrl>
key when making the selection. If the user allows the system to automatically
assign a room (<Ctrl> + <F8>), it will search based on the
features entered. In any event, a room will be selected based upon the
room type that has been entered in the room type field and matching features
entered. If there are no rooms available with the matching features, IDPMS
will display a message:
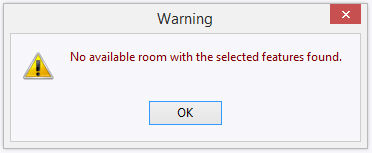
Rooms can also be assigned from the room drop down menu. This
manual selection does not filter based on features, it shows rooms based
on the room type entered in the roomtype field.
Room - A room number can be selected and linked to the folio. The
list of visible room numbers depends on the room type that is entered
and the arrival date. A room number can also be assigned automatically.
This takes place in a preset order. When installing the system the order
in which rooms will be assigned is set. This is to prevent repeatedly
re-selling the same rooms. See Room Setup
for more information.
Extras - Additional guest requests can be entered. These can include,
an extra bed or baby crib, but also renting a bicycle or reserving a parking
space can be considered an extra. Extras are customizable per
property. See Extras
for more information.
To add an extra, type in the text field or click on three dots:

The Extra window will appear:
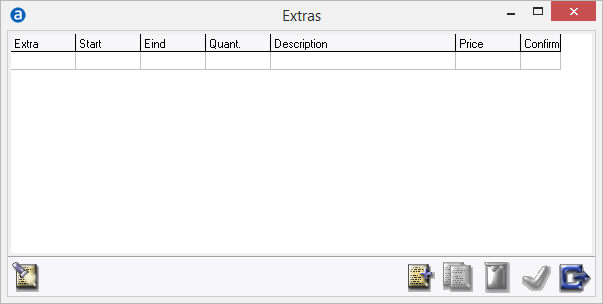
No extras have been booked for this reservation, since all fields are
empty. By clicking on the 'new' icon,
the next window appears. Here the extras can be entered. See Extras for more information.
Some Extras are linked to an inventory and can be booked based on inventory
availability. See Extra inventory
for more information.
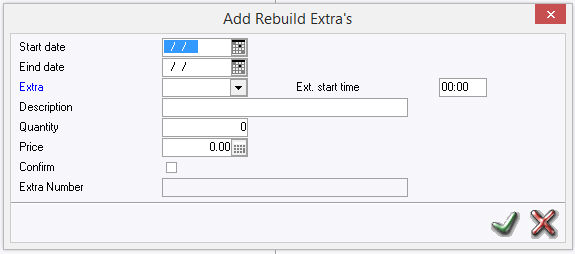
Start date - The start date for the extra.
End date - The end date is entered.
Note: if
no start date and end date are entered, the system will assume that the
Extra is booked for the entire stay.
Extra - Select the extra from the drop down.
Extra start time -
Description - A short description of the extra concerned is
given. Filled automatically, can be adjusted manually.
Quantity - The quantity. Filled automatically and can sometimes
be adjusted manually depending on set-up of the extra. See Extras.
Price - Price per extra. Can be calculated automatically (greyed
out) or entered manually, depending on the settings.
Confirm - Can be checked if the extra should be displayed on the
confirmation letter.
If all information has been entered correctly, click the green check mark.
The extra created will now appear in the Extras main window.
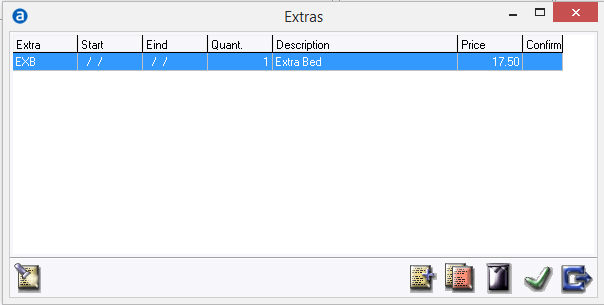
Click exit window in order to go back to the reservation window. The extra ' EXB' is now displayed in the Extras field. To cancel an extra, select the extra in the Extras window and then click the recycle bin (garbage can).

Do not move - Can be checked if this room number is
a specific room requested by the guest or preassigned by management.
Room number drop down will be greyed out:
Preference - Additional information about the guest can be entered.
For example flowers in room or allergic to smoke. This is for information
only and may appear on some custom reports.
Allotment - Allotment for this reservation can be entered. If this
field is completed, the reservation will be taken from the travel agent's/wholesaler's allotment.
See also Allotments.
Payment - Behind payment, four fields are available. These fields are linked to the sub folios of the guest account. From the left to the right the four fields correspond with sub folios A, B, C and D. See The Posting detail screen. In each field the desired method of payment per sub folio can be selected. This might be useful if a guest wishes to put his or her accommodation costs to the company's account and pay all other costs in cash. It is also useful if two guests or more are in the same room and want separate folios. It is recommendable to directly add a charge routing. See Charge Routing.
Upon check-out the system will automatically jump to the method of payment selected here. This speeds up the check-out procedure. It is possible to choose another method of payment, if needed.
Enter method(s) of payment.

See Payment
Types for more information.
Guarantee - Select a guarantee type. A guarantee type is a method
to secure a reservation. For example by means of a credit card authorization
or a company guarantee. See Guarantees.
Tot Excl/Incl - Tot. Excl. shows
the calculation of all costs minus any extras that might have been entered.
Tot. Incl shows all costs, including the extras entered and includes all
taxes.
Card - Credit card number can be entered in case of a credit card
guarantee. Up to 4 credit card numbers can be stored by selecting the
corresponding subfolio tab A, B, C, or D.
Expiry date - Credit card expiry date is entered, if applicable
Card holder - the name of the credit card holder can be entered,
if other than guest name.
Credit limit - A limit amount can be set up to which the card is
guaranteed. If using a credit card interface, the credit limit field
can be filled automatically based on card authorizations and values setup
at configuration. For more information, see Option
EFT Interface
Deposit (1) - The deposit to be paid can be entered, depending on
the means of payment.
Due (1) - Due date of the deposit. These fields are linked to the
Guarantee method selected
above. If deposit rules are set, these fields may automatically be
filled based on the deposit rules linked to the selected Guarantee
type.
Deposit (2) - A second deposit can be entered. Again, behind this
field the due date of the deposit can be entered in the Due (2)
field. A notification can be sent on this due date. This makes it easy
to see which deposits should have been paid already, but have not yet
been settled. Again, these fields are linked to the Guarantee
method selected above and if deposit (2) rules are set, these fields may
automatically be filled based on the deposit rules linked to the selected
Guarantee type. See also
Guarantees.
Deadline - The latest arrival time of the reservation can be selected.
Depending on the guarantee type, IDPMS can enter this automatically, provided
that this option was activated during the system's setup. See Deadlines.
Option date - The option expiry date is entered, in case of an option
reservation. If an option date is entered, this will be displayed on top
of the reservation and on the availability screen. See Availability.
When checking in an optional reservation the option date will be removed.

Source - Source codes
are used to help a hotel define and manage their market segmentation.
Source Codes differ from hotel to hotel and can be configured
as requested See Source
Code.
Subsource - Can be configured in order to monitor
marketing campaigns or how business comes to the hotel. Sub sources differ
from hotel to hotel and can be configured as requested. See Subsource
Code.
These two fields can be used for statistical purposes and to make comparisons on
market segmentation and source of business. A hotel could for example
use the subsource to monitor the response it receives to an advertisement.
In rate configuration, hotels have the option to link a default Source
code to each rate type. See Rate Types.
Memo Tab
The memo field section contains two separate memo fields.
Reservation information - The left
memo field contains reservation Information and can be edited from the
reservation screen itself. Specific guest preferences can be entered,
that only apply to the reservation concerned.
Profile / group information - The
right memo field is read only and contains Profile and Group information.
Changes to the right memo field can only be done from the linked relation
profile and/or in the linked group reservation. If information has been
entered in the memo field on the group reservation, or guest, company
or agent profile, this will automatically be shown on the reservation
memo field marked with the profile heading. For example:

Information Tab
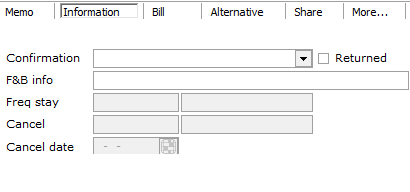
Confirmation - Select the type
of confirmation letter. This will then identify the group on the Confirmation
Verification Report. The Confirmation Verification Report identifies which
Folios have a confirmation letter selected.
Returned - The hotel can specify whether it received the signed
confirmation letter back from the guest.
F&B info - Extra guest information
can be entered that is relevant to the F&B outlets, for example if
the guest is a vegetarian, diabetic or on a diet. This information only
applies to the present reservation. If the information must also be applied
to future reservations, it must be entered on the guest profile under
kitchen info. See Guest profile.
Freq stay -
Cancel - If the reservation is
cancelled, the cancellation number will be displayed here.
Cancel date - If the reservation
is cancelled, the cancellation date will be displayed here.
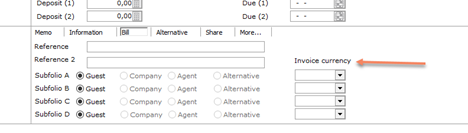
Bill Tab
The Bill tab makes it possible to select
the address to be printed on the bill per sub folio. The options
are Guest, Company,
Agent and Alternative.
Company and Agent can only be selected if a company or agent is linked
to the reservation.
If Multi-currency module is in use, and invoice currency tab is displayed as follows:
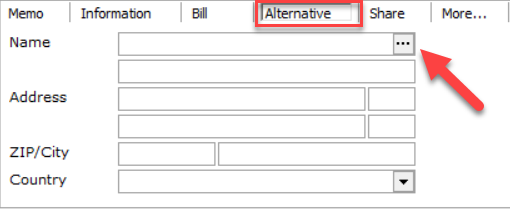
Alternative can be selected if the bill must be sent to an alternative address. The alternative address can be entered on the Alternative tab. If then Alternative is selected on the Bill tab, this will be the address printed on the bill.
An alternative address can be added manually, an existing Relation
profile can be added (guest, company or agent) or a new relation can
be created.
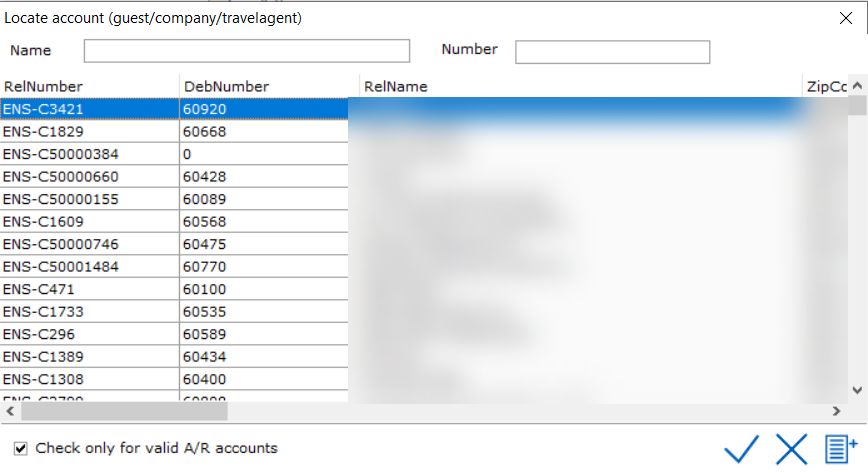
Select a relation on the list or search for name of number.
Check only for valid A/R accounts
- can be checked if only relations with a valid A/R account should be
added as alternative address.
If the folio is shared (optional per hotel), the Share tab can be selected in order to indicate the room charge split per, master/share(s) There are four different possibilities. See Share Reservation for more information.
The tab for room charge proportions
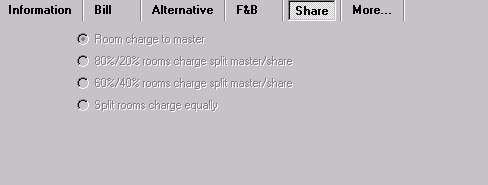
Room charge to master. All room charges will be put on the account of the master folio.
80%/20% rooms charge split master/share. Choosing this option, 80% of the room charge will be put on the master folio. The other 20% of the room charge will be put on the share folio's account.
60%/40% rooms charge split master/share. Choosing this option, 60% of the room charge will be put on the master folio. The other 40% will be put on the account of the share folio.
Split rooms charge equally. Choosing this option, 50% of the room charge will be put on the master folio. or split equally if more than one share.
More... Tab
On the More... tab several options
can be entered or activated.
Pay-TV - Select which Pay-TV
channels the guest wishes to receive. The guest can for example choose
(depending on the names used in the hotel) STD
(standard), CLO (closed) and KID
(children). Choosing the STD option all channels can be received. Choosing
CLO means that all Pay-TV channels will be closed and if the guest chooses
KID the Adult Movie channels will for example be closed. This is used
in conjunction with a Pay-TV interface.
Reference - A reference number or text can be entered. This reference
number is printed on the invoice and/or the confirmation letter.
Reference 2 - A reference number or text can be entered. This
reference number is printed on the invoice and/or the confirmation letter.
Freq Stay - If created
for this guest, a frequent stay number is displayed. See Guest
Profile.
Flight Arrive/Depart - times or flight numbers can
be entered here and used on specific reports (arrivals, In-House etc.)
These fields relate to a setting activated in Settings>Option>
Screen. See Option Screen.
Cancel - In case of a cancellation,
Cancel shows the cancellation number
and the cancellation date and time.
DID - Dial In Direct. Can be checked if the guest wishes to have a
direct dialing number, so that the guest can receive direct calls from
outside the hotel. This option is only supported if the telephone exchange
interface supports it.
DID # - The direct dialing number
of the telephone exchange is entered, if the guest wishes to use DID.
The number depends on the hotel telephone exchange/PBX
POS/Phone credit - Can be checked to indicate whether this guest
is allowed to use the phone and if the can charge to his room at the POS
(Points Of Sale).
POS detail can be checked (provided that the POS system supports
this function and is linked to IDPMS) if the guest wants the POS products
to appear on the guest bill in detail.
Viewbill can be checked (if the Pay-TV system supports this
function and is linked to IDPMS), if the guest wishes to view his or her
bill on the Pay-TV system.
If all information has been entered correctly, the reservation can be confirmed
by clicking the green check mark in the top right corner of the reservation
window. If the reservation has not been entered completely or correctly,
a message will appear indicating the required missing fields. For example:
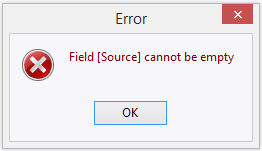
In this case no source was selected in the source field. The
reservation can still be confirmed after selecting the correct source
and then clicking the green check mark again.
If the reservation has been saved successfully, some changes take place in the global reservation window. Notice the status changes to 'Browse" instead of 'New" on top left.
Folio - This is the Guest Confirmation Number with
the Hotel 3 digit Prefix. F for folio and then the number.
Status - Reservation:
this implies Reservation Status . See also Folio
Status Codes

The folio buttons now become available. With these buttons, articles
can be booked, the account details can be displayed and other tasks can
be performed.

See Folio buttons individual reservation after confirmation for explanation of each button.