Company
The Company Relation Profile is where company details are stored and other company related functions can be performed. To access Company Relation, use the key combination <Ctrl> + <B> or access Company from the Relation Menu. In a multi- property database, Company Profiles can be shared with the other properties.
The company profile is used when a guest is employed by a company or makes reservations under a company name. Entering the company name in the reservation screen under Company and then pressing the <Tab> key commands IDPMS to search for any companies with names that correspond with the name entered. When searching by company name, it is advisable to enter an asterisk (*) in front of the name which is the wildcard search character. By entering an *, IDPMS will try to match the combination of letters entered in the search and return those matched results. A message will be displayed if the company name is unknown. You can select Yes in this dialogue box to access the company profile. Selecting No automatically takes you back to the company box.
The company name entered is unknown
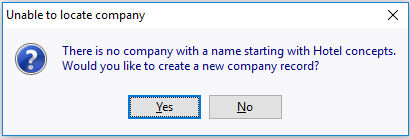
Returning to the Company box is convenient when, for example, the company name entered has been typed incorrectly. This can be seen in the message that appears after the <Tab> key has been pressed. Pressing Yes by accident after entering the wrong company name is not a disaster. The company name can also be changed in the company profile, which will be displayed automatically.
Selecting Yes prompts IDPMS to display the company profile. The unique profile number assigned to the company profile is displayed at the top of the profile window. Company profiles are indicated with the Relation Prefix code and the letter 'C' for Company, followed by a unique number. The relation code is assigned at initial setup under Option General
Companies can be assigned a status. An Empty status is the default. Cash or blacklist can also be entered. The options relate to the reservation status of the company. A company with a Cash status will only be allowed to use the hotel if it pays its bills in advance. This will be displayed immediately in the booking schedule during the check-in procedure. A company assigned blacklist status will be unable to make any reservations in the system.
The company profile
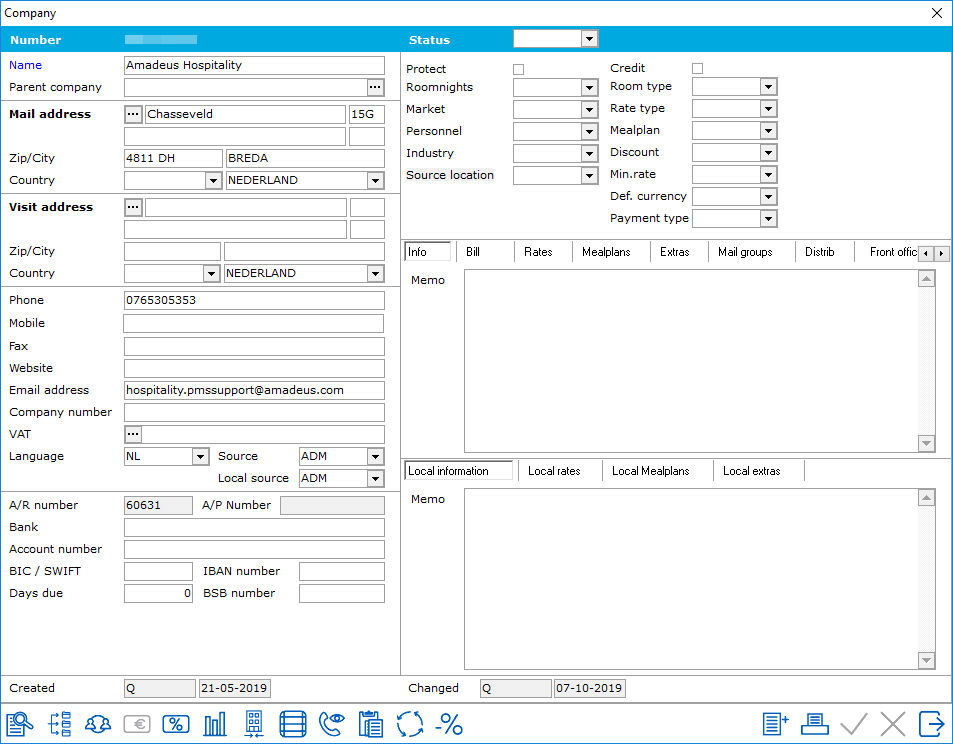
The fields for the company name and parent company

The company name entered is displayed in Name.
The name of the parent company, if applicable, is entered in Parent company. To Search for a list of Parent Companies, click on the ... at the end of the parent company field. If this is unknown, IDPMS will ask if the user would like to create a new parent company. The data entered here must be identical to that on the company profile. See also Parent Company.
A department of the parent company can be selected in the Department field.
The company address data fields
There are two address sections, one for mailing address where mail is sent and one for visit address which is considered street address. Mail address is useful if PO box numbers are used. The Mail address is what is used in IDPMS by default on all correspondence and billing. An address, possibly different to the postal address, can be entered in the Visit address field. IDPMS will not include this data in letters of confirmation and invoices.
The fields for other company data
The telephone number of the company is entered in the Phone field.
The fax number of the company is entered in the Fax field.
The Internet address of the company can be entered in the Website field.
The Chamber of Commerce number of the company can be entered in the Company number field.
The TAX number of the company can be entered in the TAX/VAT field. If VAT Validation is activated in the Option Financial, users can click (after entering VAT number without the country prefix in the field) the ellipsis next to VAT in the company profile. A dialog will be opened:
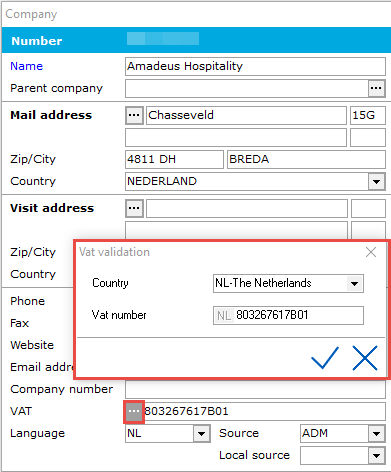
Selecting the correct country will set the correct prefix automatically. Click on the Confirmation mark to validate the number. If the VAT number is correct, following dialog will be shown:
Click on the Confirmation mark to save the VAT number in the company profile.
Select the language that will be used on confirmation letters and billing in the Language field. If this is not done, IDPMS will use the default language in settings. See Option General
A specific source can be linked to the company. All reservations booked by the company will have this as the default source code on the reservation screen unless a different default source is linked as the default source on the rate type. The rate type default source overwrites the source linked in the company relation. It is best not to assign a source to a relation unless, the source of business will always be the same for that relation profile each time a booking is made.
A specific status can be selected for the company in the Status field, similar to the guest profile. This links to Standard, Cash list or Black list. All reservations made under this company name in future will automatically be given this status.
Local Source is used if the hotel activates the local settings in IDPMS and is part of a multi property or central type environment where source information is local and will therefore not be replicated to central res or other properties.
 Clicking on the AR number icon will create and assign an AR number. Assigning an AR number within the company relation means that the company has met the required credit standards set by the hotel to allow direct billing after stay has been completed. This AR number will be permanent and then filled in the A/R number field. The number will automatically be assigned by the system unless in settings->Options->Financial(2), the 'External debtor number' is checked. If it is checked, then the user is required to manually assign an AR number. If DB (direct Bill or AR (accounts receivable) are the method of payment used on a guest booking linked to a company, where no AR number is assigned, then the system will not allow that form of payment without a valid AR number. Most hotels require credit checks before authorizing any company to have direct billing rights and an AR account.
AP number is used if the relation has an accounts payable account. AP is also used for travel agent commission handling in Agent Profiles. It is rare that AP would be used for a company.
Enter the bank with which the guest has an account in the Bank relation field.
Days Due can be used to set the number of days an invoice is due after checkout if different from the default settings in Settings->Options->Financial(2) "Default Days Due" Option Financial (2)
The fields for specific company data
More specific company information is entered on the right of the company profile screen.
Protect can be checked if this company profile may not be changed by an unauthorized user. Only a system administrator (super user) may be permitted to remove the check mark at a later date. Access is based on access rights set up in menu user access rights. The right is under Reservation Rights - "User can edit relation profile" This profile may still be changed in future if the box is not check marked. Menu User Access
Credit -This is used in association with CWI V 1 (Customer Web Interface) It can be checked if the company allows direct billing to those that book via the website and CWI. It will allow a booking to be confirmed online without a credit card once the booking is linked to a company with valid AR/DB rights.
Room Nights - A Company can be linked to a 'room nights' category. Different room night categories might be assigned to different relations based on the anticipated production of that relation. For more information, see Room Nights
Specific room types can be selected in the room type field. This room type will then be automatically selected as standard on each subsequent occasion that this guest makes a reservation linked to this company. This would only be filled if a company demands a specific room type.
Market is used to link a company to a specific Market type. This is useful if using the Mailing Wizard in IDPMS and the user wants to extract specific companies from the database that are linked to a specific 'market' type. See Market Code for more information in creating market code pick lists.
Specific rate types can be selected in rate type . This rate type will then be automatically selected as standard/default on each subsequent occasion that this guest makes a reservation linked to this company. It can be overwritten also in the reservation. It is only advisable to fill this field if the company only ever books one specific rate type.
Specific mealplans can be selected in mealplan. This mealplan will then be automatically selected as standard/default on each subsequent occasion that this guest makes a reservation linked to this company. It can be overwritten also in the reservation. It is only advisable to fill this field if the company only ever books one specific mealplan.
Personnel is used to identify the size of a company. To see more information on creating the picklist, see Personnel
A specific discount can be selected (if the company is entitled to a discount) in the Discount field. The selection of a discount amount or percentage will then be factored in automatically in all future reservations made by the company in question. To see more information on setting up discounts, see Discount
Industry Type- Companies can be grouped together into various Industry or Branch types. A selection can be made from the picklist. To see more information on creating the Industry/Branch Types, see Industry Type
A minimum rate restriction can be linked to a Company Relation and can be selected in the Min. Rate field.
Source Location is used to identify source locations and can also be used in the Mailing Wizard tool to extract all companies from the database per source location. For information on creating Source Locations, see Source Location
Def. Currency - A default currency can be linked to a relation profile. The currency types and maingroups need to be created first. See Exchange Rate. Once a currency is selected, the relation's bill will be converted to this default currency. Note- A special form of the invoice.rpt report needs to created to accommodate this functionality. The invoice exchange details are saved in the invoice_history table in the database. If the Def. currency is left blank, the invoice and billing for the relation will be in the local currency of the IDPMS system.
The Information tab

Company information that may be useful when processing reservations made by the company in question can be entered in the Information tab. Text entered in this field will copy to the memo field on all reservations linked to the company and will be marked with a heading "Company Info"
The Bill tab
An alternative account address can, if applicable, be entered in the Account tab. IDPMS will then use this address instead of the post address.
The Rates tab
The rates available to this company can be indicated in the Rates tab. To assign specific rate types, drag the rate types from 'Not available' pane to 'Available' pane and save. When a reservation is linked to the company, only those rate types in the 'Available' pane will be available to book. If nothing is moved to the 'Available' pane, the default is that all rates are available .

In the example below, All rates are available to the company because nothing has been moved to the Available pane. If nothing is moved, the default is all rate types are available.
The Mealplans tab
The Extras tab
The Mail groups tab
The mailing tab works with the Mailing Wizard tool in IDPMS. It allows the user to link a company to specific mailing(s) and when these mailing are selected using the mailing wizard, companies that are linked, will be included in those mailings.
Indicate the mailing selections in which this company may participate in by dragging and dropping to the right window marked 'Include'. If nothing is in the 'Include' pane, this means that the company is not included on any specific mailing lists. To remove a company from a mailing list, drag the mailing selection back to the 'Exclude' pane. See Mailings for more information.
The Distrib (Distribution) tab
Number - An access number can be entered here if the hotel uses the CWI v1 interface. Companies can then pull up their rates via the website using the CWI interface and this special login number and pin. It is also possible to search on this number in the company seek window.
Pin Code- Customers that use CWI (Customer Web Interface V 1) have the ability to assign a pin number to access their profile. This number is stored here.
Internet username - Customers that use CWI V2) have the ability to assign a username to access their relation profile in IDPMS via the website and this information is stored here.
Internet password - Customers that use CWI V2) have the ability to assign a password via the website and this information is stored here.
Subchannel - Currently, this field is not used.
The Front Office tab
Text entered in the FO message field will pop up for all bookings linked to this relation profile. The message will also appear on check-in, checkout and copying of folios linked to this relation.
The Local Information tab.
This is used in a multi- property environment where local memo text can be linked to a relation and will not be up loaded or replicated to other properties linked in the database. The information remains local to the hotel and visible only within the property. This 'local' option needs to be activated if a hotel wants to use it. It can be activated under, Settings->Options->Modules - > 'Use local rates and info'
The Local Rates tab
Local rates can be used in a multi property database where relation profiles are shared. Some hotels on the central database may offer different or additional rate codes to the same company. If local rates is activated at a hotel, the hotel can assign available rates that they offer the company locally. When a reservation is being booked for the company, local active rates (those dragged over to the 'Available pane' in local rates will be visible)
The information remains local to the hotel and visible only within the property. This 'local' option needs to be activated if a hotel wants to use it. It can be activated under, Settings->Options->Modules - > 'Use local rates and info'

When all the company data has been entered satisfactorily, click on the green check mark to confirm and save the data input.
At the bottom of the Company Relation Window, there are more icons which are explained below:

 This is the seek icon. Using this will open the seek window and allow search criteria to be entered to find a specific Company Relation.
 This icon is used to enter departments of the company. There is no limit to the number of Departments that can be linked to a Company
IDPMS will display a message on the first occasion that this icon is clicked.
Adding a new department
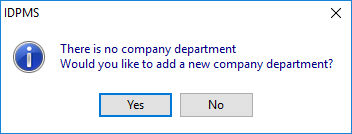
Selecting 'Yes' in this box will access the department screen. If No is selected, the system will automatically return to the company profile.
Click Yes when the department name has been entered correctly. Clicking on Yes by accident when the wrong name has been entered is not a disaster. The text can be changed in Name in the Department screen, which will be displayed automatically.
The department entry screen
 You can opt to either enter the data manually or copy (transfer) all relevant data from the company profile. Copy data from the company profile by clicking on this icon.
 This icon makes it possible to combine/ merge two departments. When this icon is clicked, IDPMS will display a list of all departments in the company. IDPMS will then combine the selected department with the new department.
When two departments have been combined, this can not be undone. The department in question will have to be entered again. So take care when combining departments.
 Use this icon to add a contact person to the department in question or directly to the company. Clicking on this icon will display a list of all contact persons already entered for this company. A contact person may be selected from this list. If this contact person is not on the list, they can be added by selecting the add icon.
Contacts can be assigned a Status. This is primarily to keep track of those contacts that may no longer be active within a company. The hotel may want to maintain the contact information but not include them in future mailings for example. To assign a status, select from the drop down menu at the top of the Contact window. To find out more about creating contact status codes, see Contact Status
 Assign to user can be used to assign the contact to a specific employee at the hotel or a member of the hotel's sales force team.
Mailgroups can also be linked to a contact. This allows the hotel flexibility in assigning specific mailings to contacts of a company.
 You can opt to either enter the address data manually or copy (transfer) all relevant data from the company profile. Copy data from the company profile by clicking on this icon.
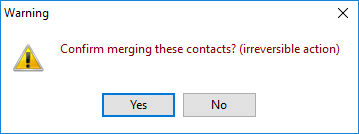
 When a contact person is selected or entered for the first time, clicking on this icon will combine selected contact persons. Combining contact persons is carried out in exactly the same manner as combining departments. Here too, this option can not be reversed once completed.
This is an irreversible action
 Use this icon to assign an AR number to a company. Clicking on the AR number icon will create and assign an AR number. Assigning an AR number within the relation means that the company has met the required credit standards set by the hotel to allow direct billing after stay has been completed. This AR number will be permanent and then filled in the A/R number field. The number will automatically be assigned by the system unless in settings->Options->Financial(2), the 'External debtor number' is checked. If it is checked, then the user is required to manually assign an AR number. If DB (direct Bill or AR (accounts receivable) are the method of payment used on a guest booking linked to a company, where no AR number is assigned, then the system will not allow this form of payment.
 This icon is used to merge company profiles together. Once completed, the action is irreversable. To merge two companies, first select the company that is to be merged to another company and merge it to the receiving company.
As with the combination of departments and contacts, combining companies is an irreversible action. Accidental combination of incorrect companies can not be undone. The only option is to create the company in question again.
 Access the `Relation analysis' screen of the company in question with this icon. This provides precise information on how frequently a company has made reservations in a specific period, how many guests have stayed overnight and what the total turnover is of all bookings made at the company's expense. Averages of revenue per stay, per night and per guest are also displayed. This screen is therefore very handy for statistical purposes.
The relation analysis screen
 Use this icon to check the history of all guests from the company in question that have ever stayed at the hotel. Click on this icon to access a screen with a list of these guests. In a multi-property environment, all stays are listed and specified by property code prefix making it easy to identify the individual properties.
 Click on this icon to trace contacts/agreements that a member of the hotel staff has with a company. This is a contact management option for the Sales department which will not always be active. Whether this option is activated or not depends on the rights assigned to the user and if the sales module is activated. See Contact Manager for more information.
 This icon copies the relevant address data to the clipboard (memory). If you then select `paste' in a word processing application such as Microsoft Word®, the copied data will be `pasted' into the current document. Using this icon can therefore save a great deal of time when creating letters or other forms of communication.
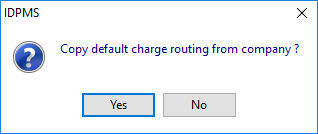
 This icon is used to set up default charge routing for the Company. For example, if the Company always pays room and tax charges, this can be set up using this icon and all reservations linked to the company will have the option to have this charge routing rule in place. When a new booking is being made for the company that has charge routing set up in the company relation profile, a window will pop up asking the following;
See Charge Routing for more information.
 This icon is used for adding or linking a discount per property code. In a multi-property environment where company relation profiles are shared, a different discount per property for the same company can be used. For example, the company may only offer a discount to one of it's hotels or different discounts at different hotels. See Discount
 The printer icon within the relation profile window is used to open a document from editor. An example may be a welcome letter. The letter first needs to be created in editor and then added to the confirmation list. See Confirmations
An example below shows how a Company Letter can be set up in Confirmations. The letter needs to be linked to the correct relation module in order for it to appear in the picklist within the relation profile.

At the bottom of the relation profile window, there are two fields that show Created and Changed.
Created will identify the user that created the relation profile initially. The date created is also noted.
Changed - will identify the user that made the last change including the date of change.
 This icon will now be displayed on the right of the company section of the reservation profile.
Clicking on this icon reveals three other icons. If the Department and Contact icons are grayed out, it means that no departments or contacts are linked to the company.
Use this sub menu to view and possibly change the company, department and contact person by clicking on the relevant icon.