This is the icon that
opens the Contact Manager. The icon is available from all the relation
windows as well as on the individual reservation screen and group reservation
screen.
This is the icon that
opens the Contact Manager. The icon is available from all the relation
windows as well as on the individual reservation screen and group reservation
screen.Contact Manager is also referred to as the 'Sales Module' in the PMS. A valid license is required and once the settings are activated, the Contact Manager is available to use. The Contact Manager allows users to set reminders and appointments or traces on relation profiles and contacts (Guest, Company or Agent) and also on individual reservations or group reservations. To use the Contact Manager tool, trace actions and categories need to be set up by the hotel. For more information on Traces, see Trace Type and Trace Action.
Users with active rights in the PMS can utilize traces to assist them in following up with a specific relation or folio. Traces are used primarily by Sales and Marketing but can also be an excellent tool for operations to track various types of reminders that need to be linked to a Guest, Company or Agent, Contact or specific Folio in the system.
Trace reports are available in the PMS under File > Reports > Relation > Sales Traces.
This is the icon that
opens the Contact Manager. The icon is available from all the relation
windows as well as on the individual reservation screen and group reservation
screen.
By clicking on the icon, from the reservation screen, the following message will pop up:
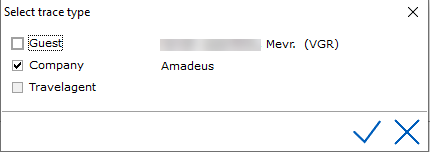
The Relation Profiles linked to the folio will be available for selection. In the example above, there is a Guest and company linked. Travel agent is greyed out because there are no agent contacts linked to the folio.
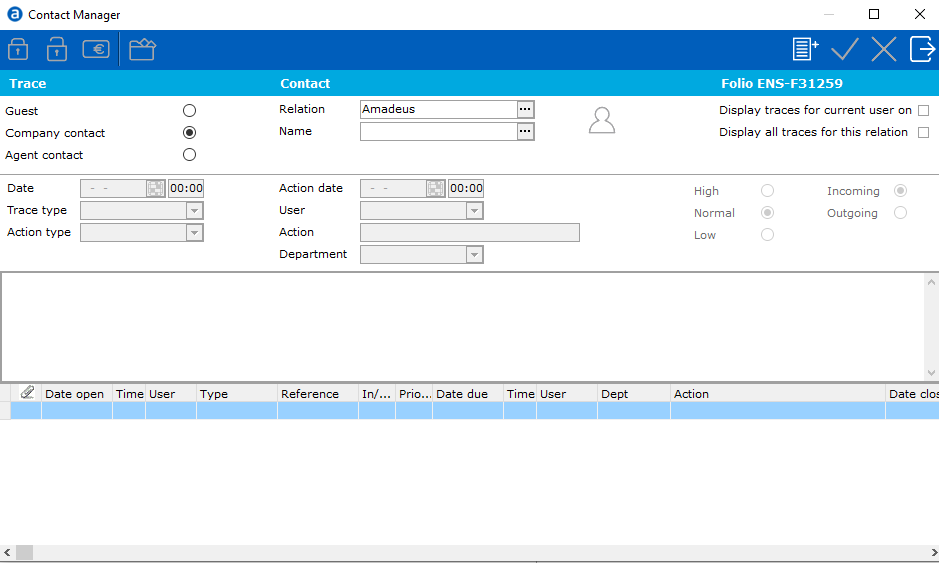
By selecting
the checkmark, the contact manager window will open with the link to the
selected relation. In this example company Amadeus.
To create/add
a new trace click on the add/new icon  in the top right corner of the Contact Manager window.
The following screen will open:
The data fields from the Contact Manager window are explained below:
Relation Contact Fields:

The radio
button selects the relation type. In above example Guest.
If a Relation contact is linked (guest card,
company contact card or agent contact card) the icon to the right is active
and can be used to go directly to the relation profile.
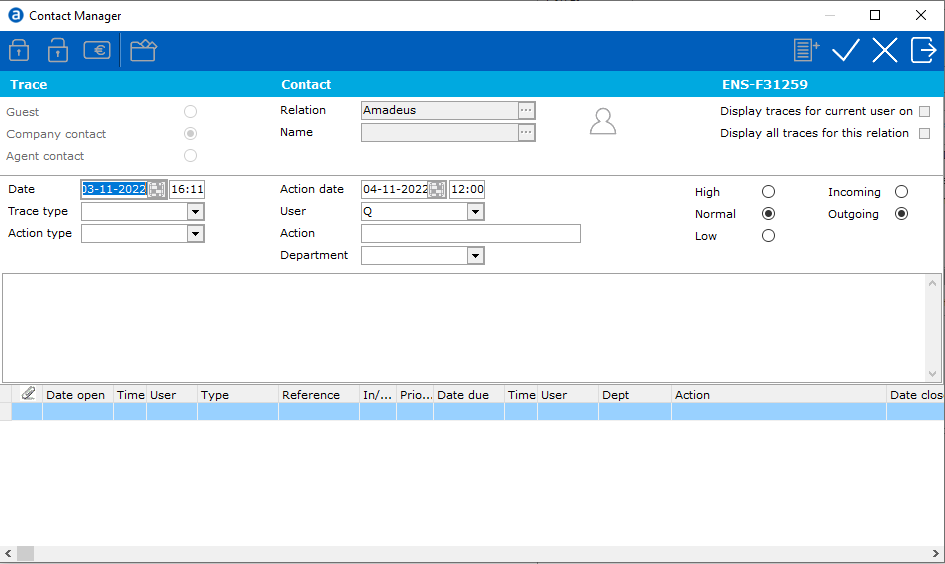
The example
below displays a company contact:

Time and Trace Fields:

Date
/ Time - Defaults to current date and time.
Action date / Time - Enter the date and time where the
action or trace needs to happen. Time is 24 hour military time format.
Trace Type - Select the type of trace required.
This pick list is created by the hotel on initial setup and installation. See
Trace Type for more details.
User - Defaults to the current user (user logged on). However,
a different user can be selected and the trace can be created on their
behalf and will therefore appear on their Trace action report.
Action Type - Select the action type of trace
required. This pick list is created by the hotel on initial setup and
installation. See Trace Action for
more details.
Action - This field will be filled automatically based
on the trace action selected (a description of the action is what is used).
Department - A trace can be assigned to a specific department
if needed. It is then possible to filter trace reports per department
if using departments. The list of departments is compiled by
the hotel at initial setup. For more details, see Agenda
Department.
Priority Fields:
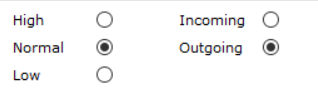
The trace
can be assigned to a priority High, Normal or Low. The default is 'Normal'.
By setting a priority, it does not issue any warnings in the system. Priorities
are displayed on trace action reports.
The trace can be marked as incoming or outgoing for internal purposes only.
Text Fields (example):

The text
field allows the user to enter any information relating to the trace action.
Text is unlimited and will also print on the Trace action reports.
Display Trace Fields: When contact manager is opened it is possible to select how traces are displayed.
Display Traces for Current User: Displays any traces on the relation created or for the current user logged on to IDPMS.
Display all traces for this relation: Will display all traces created by all users.
The default is for current user.
Trace example:
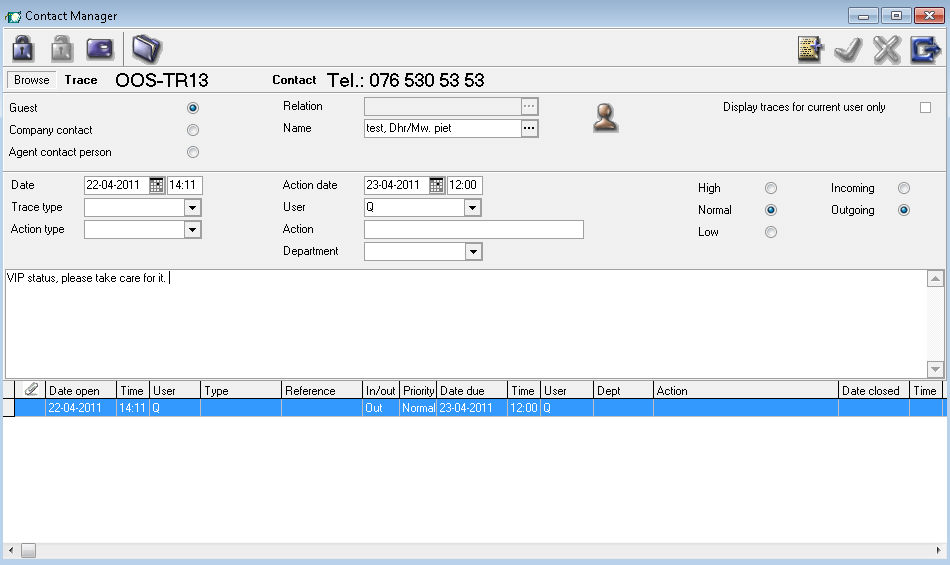
Below the test window all traces are listed based on the display selected (current user only or all users) The column headings are explained below:
Paperclip : When there is a
check mark below it means a document is attached to the trace. By right
clicking below the paperclip you can find the attached documents and you
can open the documents from here.
: When there is a
check mark below it means a document is attached to the trace. By right
clicking below the paperclip you can find the attached documents and you
can open the documents from here.
Date Open: The date that the trace was opened/created.
Time: Time the trace was opened.
User: The user that opened the trace.
Type: The trace type
Reference:- If a document number is assigned to the trace, it gets filled in this field.
In/Out : Specifies if it's marked as an incoming trace or an outgoing trace.
Priority: Show which priority was selected
Date Due: Trace action due date (when the trace should be acted upon).
Time: Trace action due time.
User: The user assigned to the trace.
Dept: Identifies the assigned department
Action: Description of the trace action.
Date Closed: If a date is filled, it identifies the date that the trace action was closed.
Time : Time closed
User: Identifies the user that closed the trace action.
Contact Manager Icons

 This icon is used to close a trace. Highlight the trace in the Contact
Manager window and select this icon to close that trace action. The close
date, time and user will automatically be filled in.
This icon is used to close a trace. Highlight the trace in the Contact
Manager window and select this icon to close that trace action. The close
date, time and user will automatically be filled in.
 This icon can be used to reopen a closed trace. Highlight the trace in
the Contact Manager window and select this icon to reopen that trace
action. The close date, time and user will automatically be removed.
This icon can be used to reopen a closed trace. Highlight the trace in
the Contact Manager window and select this icon to reopen that trace
action. The close date, time and user will automatically be removed.
 This
icon is used to assign a document number to the trace. Assigning document
numbers may be helpful for manual filing only. If the Trace is incoming,
the document number assigned will have the prefix ID###,/ If the
trace is outgoing, the document will be assigned a number with a prefix
of OD###.
This
icon is used to assign a document number to the trace. Assigning document
numbers may be helpful for manual filing only. If the Trace is incoming,
the document number assigned will have the prefix ID###,/ If the
trace is outgoing, the document will be assigned a number with a prefix
of OD###.
 This icon is used to attach documents to traces.
For IDPMS: There is no limit on the number of attached files and
all files are supported. When a file is attached, a copy of the file will
be saved within a file. This file you can configure in IDPMS by going
to: Settings > Options > General > Path Trace Documents. See
Option General.
Once a file is attached it will saved in that specified folder and gets
a random file name. Please be advised when renaming the file in the specified
folder (within Settings > Options > General > Path Trace Documents)
you can't find it through the traces anymore.
A copy of the file path name where the document is saved to will be saved
within our database.
APMA: For APMA, the Windows file explorer is disabled for trace documents when attaching a file to a trace record. Instead a dialog is shown where the user can enter the (local) path where the document has been placed (by user):
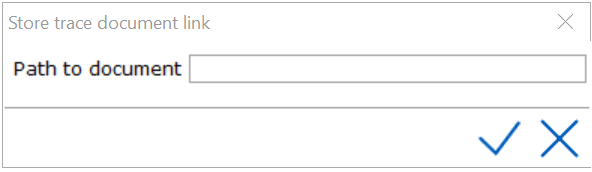
When the trace record is saved, the user can copy the link by right clicking
on the attachment icon in the trace. After the right click, a list will
be shown with the linked documents
 This
icon is used to access the guest relation or contact profile directly
from the contact manager window. If it is grayed out, there is no company
or agent contact linked.
This
icon is used to access the guest relation or contact profile directly
from the contact manager window. If it is grayed out, there is no company
or agent contact linked.
Adding traces to contacts:
A trace can
be added directly to a contact. Contacts are linked to companies and travel
agents. Contacts can also be assigned a status code and made inactive.
In the example below, a company contact is being used .
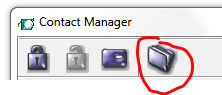
To access the company contact first search and locate the company from
within the company window. Select the contact icon the
Contact Manager window will open.
the
Contact Manager window will open.
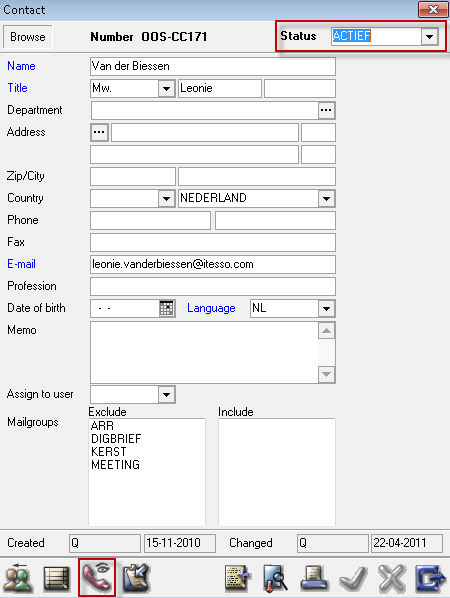
The above contact has an 'ACTIVE' status and therefore the contact manager icon is available to add any new traces.
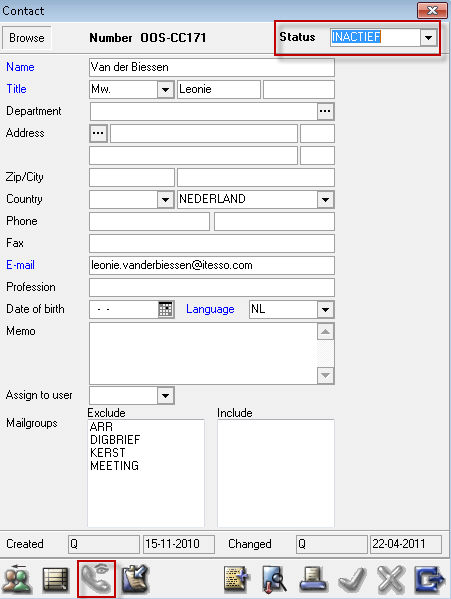
The above contact has an 'INACTIVE' status and therefore the contact manager icon is NOT available to add any new traces.
For more information on contact status - see Contact Status
The PMS does not provide pop-up windows on traces and therefore the users are required to view and access traces by reports or directly from within the folios or relation profiles. All trace reports can be found under the following file path in IDPMS:
Reports > Relation > Sales traces
Following up on traces:
Possibility
to create links to external documents.
As of version 3.15.2.xx it is possible to link a document to a trace
to find belonging information directly to the trace.
Therefor you can open in all traces screens:
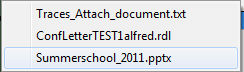
In this example a document called “Traces_Attach_document.txt” is linked to this trace. A dialog is opened when clicking this button. Select the file you want to link.
After creating
a link, in IDPMS a checkbox appears in the first field. 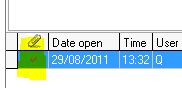
The hint in the lower screen tells to right click to open the link.
After clicking the file will open, when it is a link to a file with a known format. (pdf, pptx, docx, etc). Multiple files can be selected.