When
the reservation has been entered as desired, the guest often wishes to
receive a confirmation of his or her reservation. This icon opens the
Print menu or shortcut <F10>.
When
the reservation has been entered as desired, the guest often wishes to
receive a confirmation of his or her reservation. This icon opens the
Print menu or shortcut <F10>.Confirmation Letters can be configured in IDPMS Editor and added as a selection to the confirmation print menu picklist. See Editor for more information on creating letters. See Confirmations on how to add a letter created in Editor to the Confirmation picklist in IDPMS print menu.
When
the reservation has been entered as desired, the guest often wishes to
receive a confirmation of his or her reservation. This icon opens the
Print menu or shortcut <F10>.
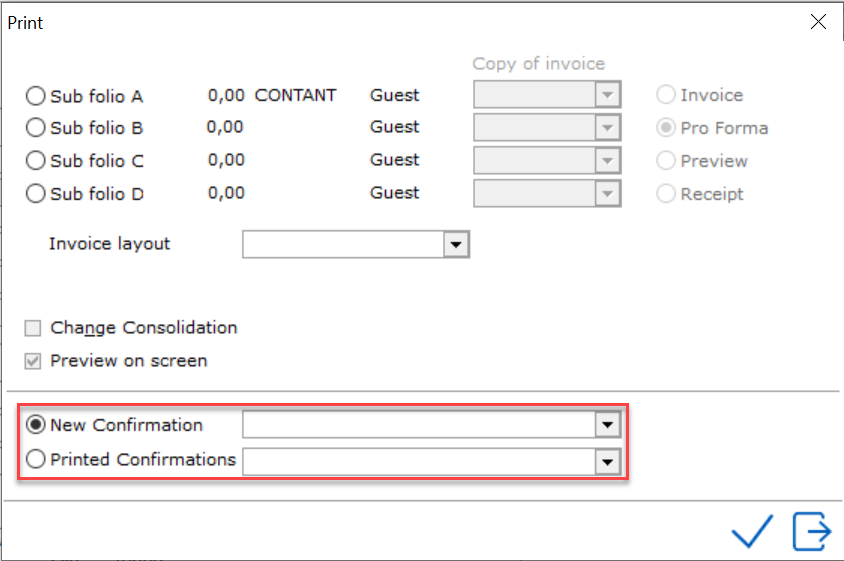
In the New Confirmation
field the type of confirmation can be selected. Usually the options will
be Company Confirmation Letter and Guest Confirmation Letter, but this
depends on the number of letters configured and used at the
hotel.
For example:
Confirmation letters always first appear on the screen so that necessary changes can still be made to it. If all is ok, click the check mark.
The letter will display on the screen activating Editor.
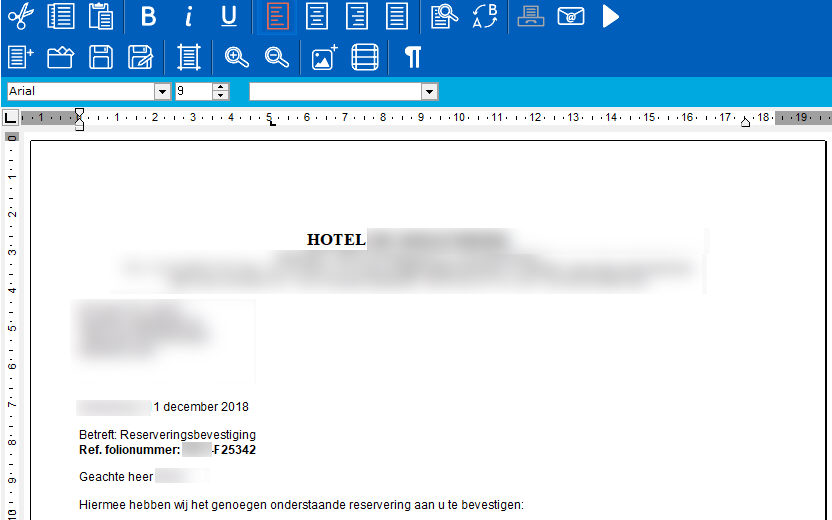
Changes can be made if needed and then saved using the save icon 
To Print the letter, click the printer icon to print the
confirmation letter.
To Email the letter, click the email icon.  When
choosing to send by email, the following window will appear:
When
choosing to send by email, the following window will appear:
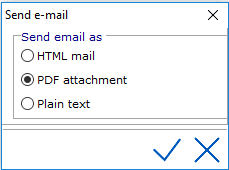
The user can select the method from the 3 choices above.
To Fax the letter, click the fax icon (if Winfax interface is installed)

To Verify if a Confirmation Letter has been printed or emailed:
When letters are saved or printed, they are stored in a separate database
(stored documents) usually called IDPMS_Stored_Docs.
As of IDPMS version 4.1.7 it is possible to store
confirmations within the PMS database instead of in a separate database.
This setting is enabled by default for APMA. See Option
System Setting.
Stored documents can be accessed via the print Menu.
To check if a letter was printed, select the print icon from the folio
reservation screen and the print menu will appear.
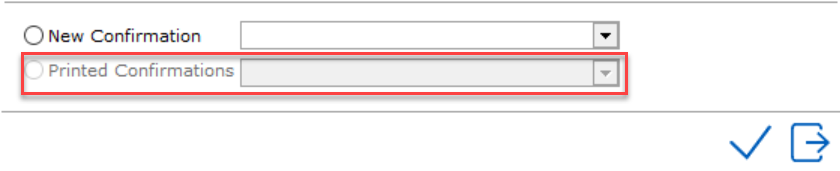
If a letter is created, printed confirmations is available:
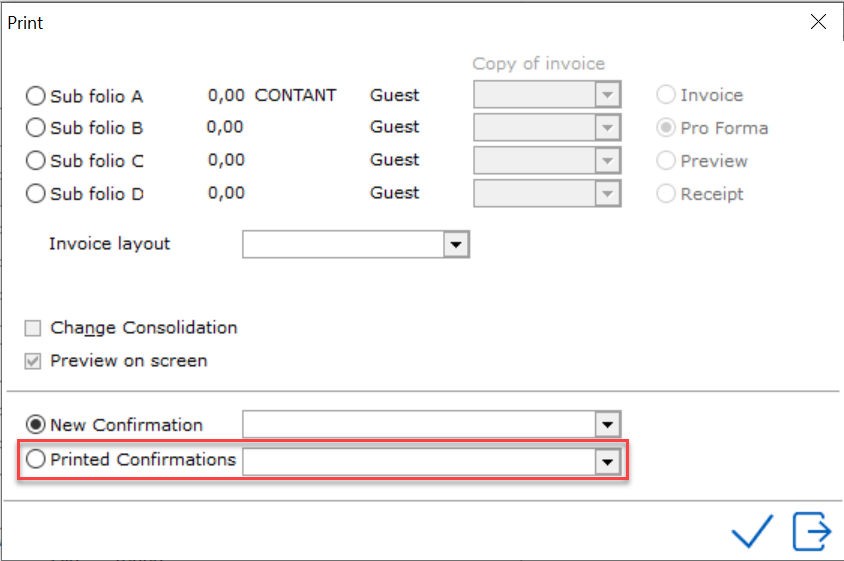
The drop down offers more information:

The date, time and a description of the letter are stored. To access any of the stored letters, select the letter in the browse window and use the check mark. The letter will be opened.
If no letter is created for the folio, the option is greyed out: