Editor
The Editor is the tool designed to easily pull information from several sources in IDPMS into one customized Letter (Welcome Letter, Confirmation Letter, etc.)
With the Editor, information from guest, company and travel agent profiles as well as individual and group reservations can automatically populate in the confirmation letters.
Note: don't make any changes in the confirmation letters if you don't know how it works. Always make a back-up before changing anything!
To start the editor, go to Extra > Editor. The following window subsequently appears.
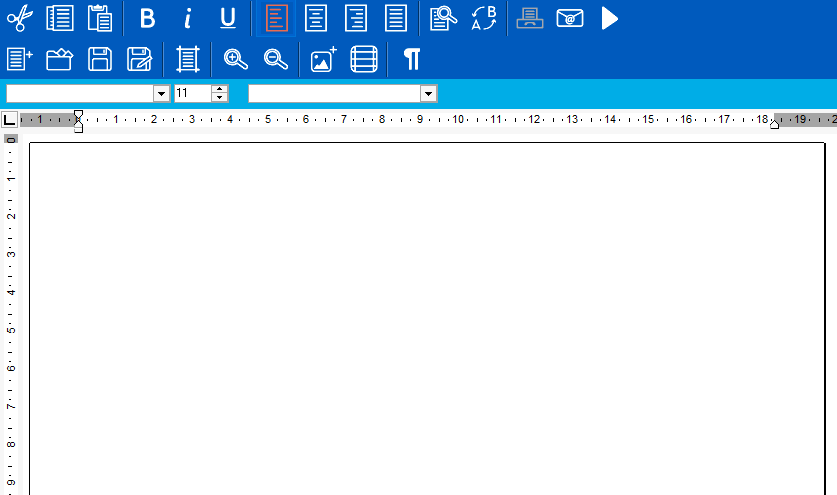
As seen above, the IDPMS word processor has elements that are recognizable from other word processors.
A short description is given below of all the buttons that are found in the word processor. These buttons shall be further explained.

The first button is a button that is used to cut a selected piece of text. This function works in the same way as it does in Microsoft Word. When a piece of text is cut, it disappears from its current location and the selection is saved in the memory of the computer. The cut text can then be placed in the desired place in the document using the "paste" button.
 The following button is a button for copying a selected piece of text. This can be very useful when the selected text occurs repeatedly in a document. In this way, this text does not need to be typed again. The copied text is likewise saved in the memory of the computer. The copied text can then be placed in the desired place in the document using the "paste" button.
 The following button is a button for pasting a piece of text. The text that is pasted is the piece of text that was cut or copied and placed in the memory of the computer earlier. Note that the place where the piece of text is pasted is the place where the cursor is found. The position of the cursor can be selected using the mouse.
 The adjacent three buttons can be used to change text or individual letters. The first of these buttons can be used to make parts of the text or individual letters bold.
 The second button can be used to italicize parts of the text or individual letters.
 The third button underlines the selected part of the text or individual letters.
Besides determining the appearance of the text, the IDPMS word processor also allows you to set the page layout. Buttons in the IDPMS word processor allow you to left-justify, right-justify or centrally-justify pieces of text.
 The first button for justifying is the button for left-justifying the selected text.
 The second button is for centring the selected text. The lines are positioned precisely in the middle of the page.
 The third button can be used to right-justify the selected text.
 The fourth button is the button for aligning both left and right edges of the selected text. This means that the selected text is horizontally spread evenly over the page. The length of all the lines is therefore made equal.
 Another two buttons which each have a type of search function are also found on the first line. The button depicted here allows you to search for a certain word in the document concerned. This button is especially used in larger texts.
 Besides allowing you to find a certain word in a document, the second search button also allows you to replace this word with another word. This is also know as the so called `search and replace' button and is often used where incorrect terminology has been used.
A number of other buttons are found under the buttons that were discussed above. These buttons focus on more general functions.
 The first button here is the button for making a new document.
 The button directly adjacent is the button for opening an existing file or saved document.
 Clicking on this button saves the current document.
 If it is the first time that this document shall be saved, one should click on the `Save as...' button.
Then the correct directory and file name can be entered. This button must always be used for saving a new document, so that an existing document is never overwritten (by accident).
 The button depicted here is the button for page layout, e.g. paper type, setting any margins and the orientation of the document (portrait or landscape).
 Next there are two buttons that are used to `zoom'. Using these buttons, one can enlarge or reduce the document image. This only affects the image and not the document itself. With this button, one can zoom in by 10% in the document concerned and with the button depicted next to it one can zoom out by 10% in the document concerned.
This button allows you to insert a picture in the document. The picture concerned must be bitmap (.BMP) format.
 The last button allows you to look at and disable all check characters in the document concerned. This is a known function in Word. For example, points where there is an <Enter> or a lt;Tab> are displayed. Points are also given where there are spaces. In this way, the document can be checked for any flaws, such as extra spaces.
Before you start creating or altering documents in the IDPMS word processor, the toolbar must also be explained.