There are many ways to pickup/add reservations to a group block. Below four methods are described.
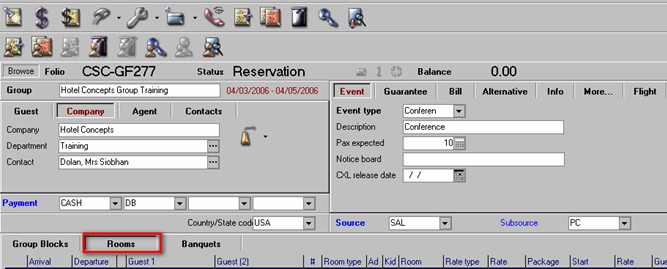
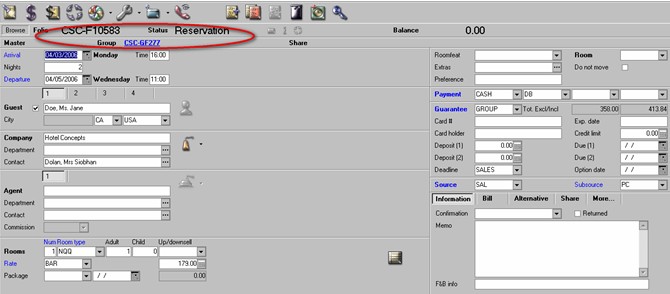
1. Reservations can be picked up from within the Group Folio/Reservation Screen.
Select the Rooms Tab in the Group Reservation Screen
Note: when this tab is selected, the second row of icons change to the following.

These icons are used to edit/modify rooms picked up in the block.
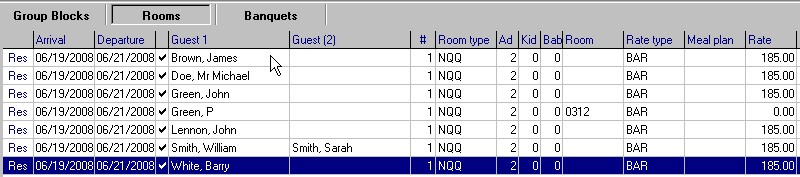
Under the Rooms Tab, all reservations will show (including cancellations)
To add a ‘New” reservation to the block, select the add new icon 
This opens up the reservation ‘Short Form’ to make the reservation.
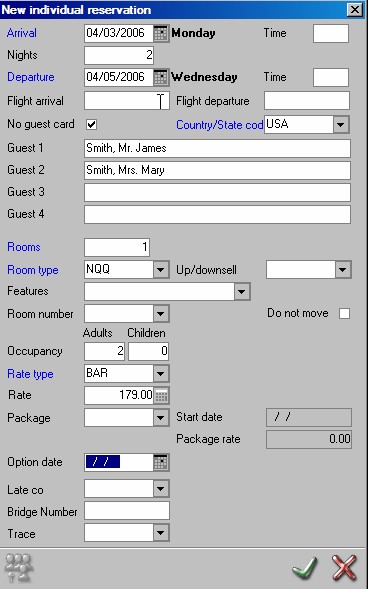
Arrival Date – defaults to group dates but can be changed
Nights - number of nights
Departure – Departure date
Flight Arrival /Departure (will be filled from group if used)
No Guest Card – If checked, no guest profile will need to be built or stored. Enter Lastname and then , Firstname if no guest card is being used.(example: Doe, Jane)
Guest 1-4 (Can Enter up to 4 Guest Names per room)
Rooms – Number of rooms to book.
Room Type – Select the room type (only those in the group block will show)
Up/sell downsell – Changes the rate based on the up/sell rate type selected (same function as in individual reservations)
Features – Select feature if required for group.
Room Number – Select room number if a specific room number needs to be blocked.
Room Type – Select room type (only room types that exist in the group block will show)
Rate – Will be filled based on what was set up in the group block.
Package – Select if a package is part of the group.
Package start and end date (same function as in reservation) Packages can be set up for a portion of the stay. If left blank, it will be applicable for entire length of stay.
Option Date – Enter an option date if needed. Option dates will show on availability screen and group reports.
Remaining fields will vary per property and will show based on user defined fields on the reservation screen. See User Defined Reservation Fields for more information.
Save Reservation by selecting Green Checkmark
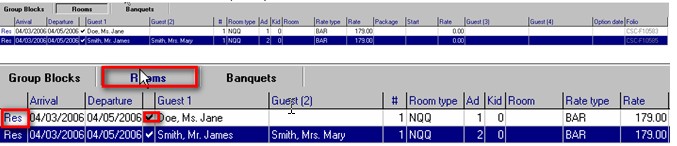
Rooms tab now shows the reservation (line 2)
The  Next to the name identifies those reservations that have no Guest card (no guest profile)
Res – Indicates that it is a reservation.
CXl - Indicates folio is cancelled.
House - Indicates folio is in-house.
2. Linking a Reservation to a Group.
An individual reservation can also be picked up for a group by linking it to a group folio.
Certain rules apply in order to be able to do this.
Select and retrieve the individual reservation that needs to be linked. <CTRL + R> Verify Room and rate type exist within the group block.
Select the link icon on the reservation screen. 
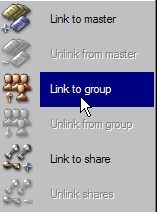
Link to Group Block.

Select Group from Browse window and save.
Reservation will now show group link and will be added to the group as another picked up room.
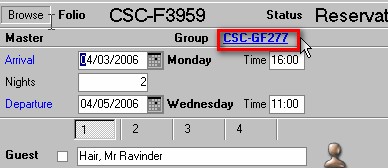
Rooms Tab will show picked up Room as follows.

To unlink a folio from the group use the link icon and select unlink from group.
3. Reservations can be picked up from the rate query screen.
Select Rate query screen  or use shortcut <CTRL>+S
Enter the dates and select the name of the group from the Group Block field. Only groups that fall within the range of arrival and departure dates in the query will be available in the group block picklist.

Select update icon on rate query screen (to the right) to see room and rate type availability for the selected group.
Results will show what is available within the group block.
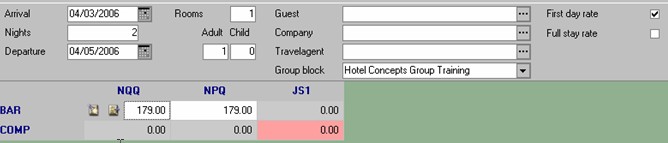
In the example below, NQQ for Bar rate is selected by selecting the add new icon in the Rate Query screen

The reservation screen opens and all information from the group folio is automatically filled.
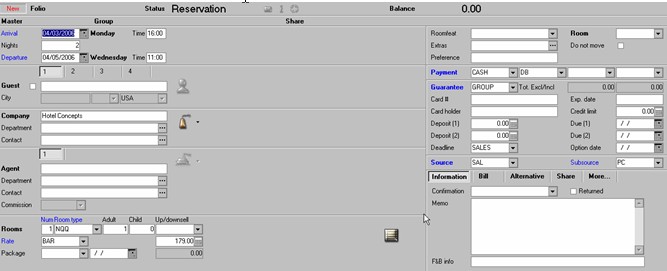
The guest name is all that needs to be added. Once the reservation is saved, a folio number is created and a blue link identifies the link to the Group Folio Number. A user can click on this link to go directly to the Group Folio.
After picking up a reservation, the group block will show 1 room picked up as follows;

4. Rooming List.
Hotels may decide to pick up multiple room bookings within a group block even if they don't have the guestlist in order to protect the blocks. Once the guestlist or rooming list is received by the hotel, the names are entered and linked to the multiple room bookings and then split out to show the individual rooms.
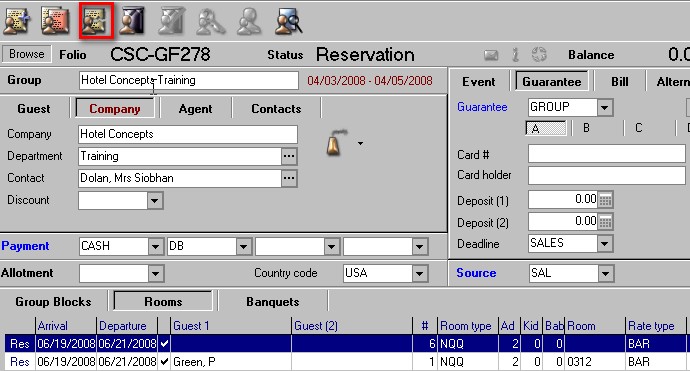
In the example below a booking is made to pickup 6 rooms using the short reservation form within the group folio as described in point number 1 above.
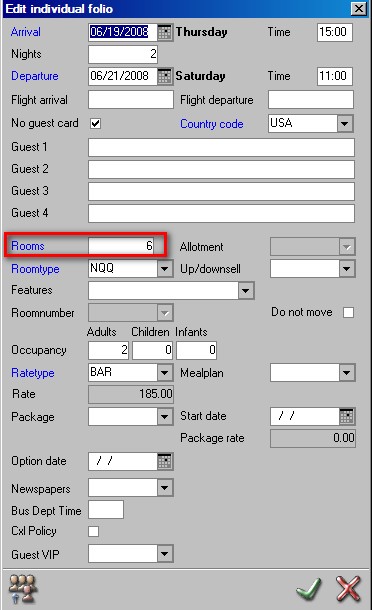
Once saved, the reservation will show under the rooms tab as seen below.
No Guest name was entered (as the rooming or guestlist was not yet received) but the 6 rooms will show as picked up with a blank guest name field.

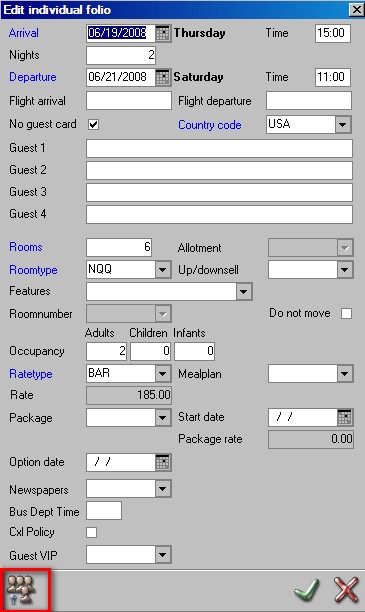
To enter the rooming list, double click on the line for the 6 room booking and the edit individual folio screen will appear as shown below. Then select the guestlist icon in the bottom left corner of the window. 
The Group Guestlist folio window will open
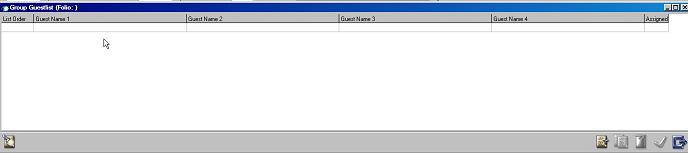
Select the add/new icon in the bottom right corner of the window to add the fist guest name on the rooming/guestlist.
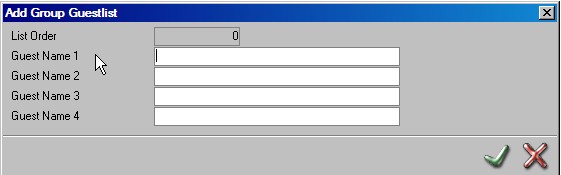
Add the guest Name in Field 'GuestName 1' If there is a second guest staying in this room, enter their name in 'Guest Name 2 field' Note Fields labeled Guest Name 1 thru 4 are for a single room NOT 4 separate rooms.
Once guest name(s) have been entered, save the folio using the green check mark.
Repeat the above steps until all guest names have been entered for this 6 room booking.

Close the window using the  and the Edit individual folio screen will be onscreen. Save this using the
The names have been added. To verify at any time if names have been added to a multiple room block folio, click on the guestlist icon and names will show. Names will only show if the folio has not yet been split. It is also possible to right click on the reservation line under the room tab and a sub-menu will appear with an option to view the guest list. 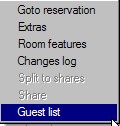
Splitting the Guestlist/Rooming List folio
To split the folio, select the folio by highlighting it from the rooms tab. Do not double click it.
Select the split room icon as indicated below.
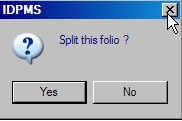
Select yes to split the folio.
The folio will then be split into the 6 separate room reservations as entered in the guestlist previously.